
Wear rarely announces itself. It accumulates the way interest compounds on an ignored balance, adding a little more cost every season until the total suddenly demands attention. A hairline crack widens through a few winters, a mineral film thickens inside a heat exchanger, a root system edges closer to a foundation footing. None of these changes looks urgent on its own, which is exactly why they so often go unaddressed until repair becomes replacement.
Protecting a property means learning to read those slow signals and acting while the fixes are still modest. Mechanical equipment, outdoor structures, living landscapes, interior finishes, and the overhead envelope all age at different rates, but they share the same pattern of gradual decline followed by abrupt failure. Homeowners who track condition, schedule service before peak demand, and replace components at the end of their useful life, not after it, spend less over time and avoid the disruption of emergency calls. The sections below walk through the systems most vulnerable to that quiet erosion and the professional work that keeps each one performing.
Flushing Hydronic Heat Exchangers and Bleeding Trapped Radiator Air

Hydronic heating loops circulate the same fluid year after year, and that fluid slowly carries corrosion byproducts through the system. Black magnetite sludge settles in radiators and low points, while hard-water scale coats the heat exchanger, insulating it from the flame and forcing the appliance to run hotter and longer. The result is kettling noises, cold spots at the bottom of radiators, and rising fuel bills. Air pockets add to the problem, and a waterlogged expansion tank can push system pressure high enough to make the relief valve weep onto the floor.
Timely boiler repairs address those issues before they damage the heat exchanger or circulator pump. Technicians power-flush the loop with a chemical cleaner, install a magnetic dirt separator to capture future debris, and dose the system with a corrosion inhibitor. They recharge the expansion tank to its rated air pressure, set the cold system pressure to roughly 12 to 15 psi, and purge air from every zone. A combustion analysis, a test of the low-water cutoff, and a check of the pressure relief valve confirm the appliance is running safely and efficiently.
Sizing High-Recovery Storage Units and Venting Combustion Exhaust
Many households outgrow their storage tanks long before the units actually fail. An undersized tank runs out during back-to-back showers, while sediment buildup at the bottom of the tank reduces usable capacity, creates popping noises, and shortens the life of the burner or lower element. Once the sacrificial anode rod is consumed, corrosion attacks the steel lining directly. Gas units with poorly sloped or disconnected vent pipes can also backdraft, spilling carbon monoxide into basements and utility rooms where it may go unnoticed.
Professional water heater installation starts with sizing the unit by first-hour rating or, for tankless models, by flow rate and temperature rise, rather than simply matching the old tank’s gallon capacity. Installers confirm that gas line diameter and BTU capacity support the new appliance, run atmospheric venting with proper rise and clearances or use Category IV PVC for power-vent and condensing models, and add a thermal expansion tank on closed plumbing systems. A drip pan, a properly routed temperature and pressure relief discharge line, and a thermostat set near 120 degrees F complete a safe, long-lasting setup.
Balancing Swim-Basin Chemistry and Resurfacing Etched Plaster
Water chemistry slowly reshapes every surface it touches. When pH and calcium hardness drift low, the water turns aggressive and dissolves plaster, leaving rough, etched patches that harbor algae and scrape swimmers’ feet. When they drift high, scale forms along the tile line and inside heaters and filter media. Cyanuric acid tends to accumulate over a season, weakening chlorine’s sanitizing power, while pumps running at a single full speed waste energy and push equipment toward early failure.
Hiring a local pool contractor for seasonal service helps keep the water balanced before damage reaches the shell. Technicians test and adjust pH to about 7.4 to 7.6, total alkalinity to 80 to 120 ppm, and calcium hardness to 200 to 400 ppm, aiming for a Langelier Saturation Index near zero. When plaster is already etched or stained, crews drain the basin, prepare the surface, and resurface it with a quartz or pebble aggregate finish that outlasts standard white plaster. A variable-speed pump and a careful start-up brushing schedule protect that new surface for years.
Resetting Leaning Boundary Posts and Swapping Split Pickets

Outdoor barriers are exposed to sun, rain, and soil moisture every day, and the damage tends to concentrate at a few weak points. Posts rot or crack right at the soil line, sections begin to lean after storms, and pickets split as wood shrinks and swells through wet and dry seasons. Rusting fasteners leave streaks on the boards, and gate hinges gradually pull loose until the gate drags across the ground and no longer latches properly.
Targeted fence repairs can restore a sound structure without the cost of a complete rebuild. Crews often stabilize a broken post by driving a galvanized steel mender alongside it and bolting the two together, while posts with extensive rot are removed and reset in fresh concrete. Split pickets are swapped for boards of the same species and profile, fastened with stainless steel screws that will not bleed rust. A turnbuckle anti-sag kit squares up a drooping gate, and a penetrating oil-based stain helps every board shed moisture through future seasons.
Thinning Overextended Canopies and Pruning Deadwood Limbs
As canopies grow, limbs extend toward rooflines, power lines, and driveways, adding weight and wind resistance every year. Dead branches become brittle and can drop without warning during storms, while codominant stems joined by included bark form a weak union that may split under snow or ice loads. Branches rubbing against the house scrape away shingle granules, clog gutters with debris, and give squirrels and insects an easy bridge onto the structure.
Routine tree trimming guided by ANSI A300 pruning standards keeps growth healthy without stressing the plant. ISA-certified arborists thin the crown selectively, typically removing no more than 25 percent of the live canopy in a single season, and use the three-cut method on heavy limbs to prevent bark from tearing. Each final cut is made just outside the branch collar so the wound can seal naturally. Weak unions may be supported with cabling and bracing, and limbs are kept well clear of the house to reduce storm damage and pest access.
Regrading Planting Beds and Aerating Compacted Turf
Soil settles over time, and grading that once carried rainwater away from the house can slowly reverse toward the foundation. Downspouts that discharge into low spots, mulch piled against siding, and planting beds built higher than the surrounding yard all direct moisture toward basement walls and crawl spaces. At the same time, foot traffic and mowing compact clay soils, which starves turf roots of oxygen and forces water to run off the surface instead of soaking in.
Experienced local landscapers begin by evaluating how water moves across the entire property during heavy rain. They regrade soil to fall at least six inches over the first ten feet away from the foundation, extend downspouts, and add dry creek beds or French drains where runoff concentrates. Core aeration pulls plugs from compacted turf, and overseeding with a regionally suited grass blend thickens the lawn. Mulch is kept to a depth of two to three inches and pulled back from siding and trunks to discourage rot and pests.
Refacing Worn Casework Fronts and Leveling Sagging Base Boxes

Storage near sinks, ranges, and dishwashers absorbs a constant stream of heat, steam, grease, and impact. Finishes wear through at the most-used doors and drawer fronts, hinge screws strip out of softened particleboard, and the floor of the sink base swells after years of small plumbing drips. Base boxes that were never anchored properly can also begin to sag under the weight of stone countertops, opening gaps at seams and creating stress cracks in the counters above.
Updating kitchen cabinets through refacing preserves sound boxes while renewing everything visible. Installers apply a new wood veneer to the face frames, hang new doors and drawer fronts on six-way adjustable concealed hinges, and fit full-extension soft-close slides. Water-damaged sink base floors are rebuilt with marine-grade plywood or covered with a PVC liner that contains future leaks. Sagging units are shimmed level, refastened into wall studs, and checked again before new countertops are set, ensuring a solid, even foundation for decades of daily use.
Rebuilding Leaking Shower Enclosures and Upgrading Humidity Exhaust Fans
Shower enclosures fail gradually through joints that seem minor at first. Caulk at the changes of plane cracks and separates, glass door sweeps wear out, and water seeps past cracked tiles into framing below. Undersized exhaust fans, or fans ducted into the attic rather than outside, trap humid air that condenses on cold surfaces, feeding mold on drywall and roof sheathing. By the time stains appear on a ceiling below, the hidden damage has usually spread well beyond the visible spot.
Thoughtful bathroom remodeling fixes both water entry and moisture buildup at their source. Contractors remove damaged tile and backer, install a continuous waterproofing membrane, and build a properly sloped curb before setting new tile and frameless glass with fresh sweeps and seals. Every change of plane is sealed with 100 percent silicone rather than grout. Exhaust fans are sized at roughly one CFM per square foot of floor area, with a minimum of 50 CFM, and ducted to the exterior through insulated rigid duct with a backdraft damper and humidity-sensing controls.
Sealing Foundation Entry Gaps and Baiting Foraging Colonies
Many household pest problems start with a small gap and a steady source of moisture. Odorous house species trail through cracks in slabs and gaps around utility penetrations, while carpenter species excavate damp wood around leaking windows, decks, and roof edges. Piles of sawdust-like frass, scouting workers in spring, and winged swarmers indoors often indicate that a mature colony is already established inside the structure rather than simply visiting from outdoors.
Effective ant control relies on a combination of exclusion, moisture correction, and baits that reach the queen. Technicians inspect the perimeter, seal foundation cracks and utility penetrations, and trim branches and shrubs that touch the siding. Slow-acting gel and granular baits allow foraging workers to carry the active ingredient back to the colony, while a nonrepellent perimeter treatment intercepts new foragers without scattering them. Wall voids with active nests may be treated with dust formulations, and fixing the underlying leaks removes the damp wood colonies prefer.
Stripping Deteriorated Shingle Layers and Installing Ice-and-Water Underlayment
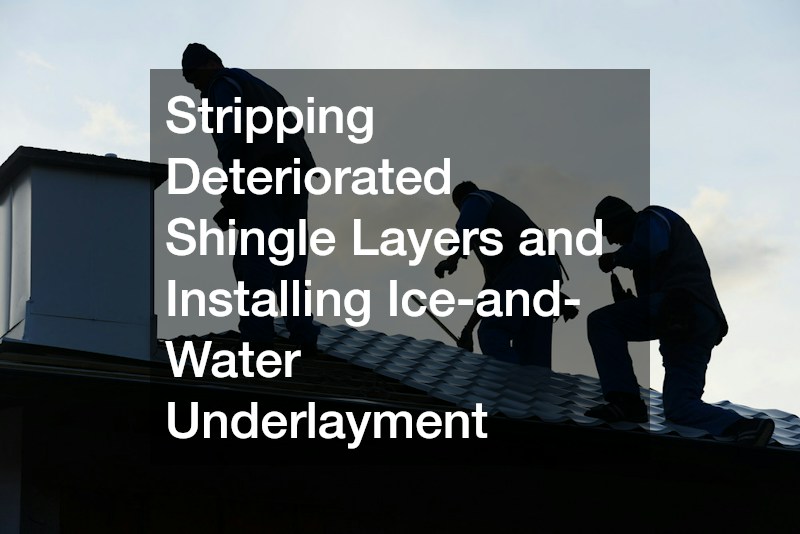
Every shingle system has a finite lifespan, and age eventually shows through curling edges, bald spots from granule loss, and brittle tabs that crack under foot traffic or wind. Homes with two layers of shingles carry extra weight and hide decking problems underneath. In cold climates, ice dams form along the eaves when heat escapes into the attic, pushing meltwater beneath shingles and into soffits, wall cavities, and ceilings.
Full roof replacements should begin with a complete tear-off down to the deck so every sheet of sheathing can be inspected. Crews renew any soft or delaminated decking, then install ice-and-water shield from the eaves to at least 24 inches inside the exterior wall line, along with valleys and penetrations. Synthetic underlayment covers the remaining deck, drip edge and new step flashing are fitted, and shingles are nailed to the manufacturer’s high-wind pattern. Balanced ridge and soffit ventilation keeps the attic cool and dry, reducing ice dams and extending shingle life.
The common thread across every system on a property is time. Heating loops collect sediment, chemistry drifts, wood weathers, soil settles, finishes wear, colonies expand, and shingles age, all at a pace that rarely feels urgent from one day to the next. The cost of waiting, however, rarely stays small. Moisture that enters through a failed joint can rot framing, a neglected heat exchanger can crack, and a limb left too long over the house can come down in the next storm.
The most reliable defense is a schedule built around prevention instead of reaction. Service heating equipment before the first cold snap, balance outdoor water features at the start and end of each season, walk the perimeter after major storms, and inspect wet areas, storage, and the attic at least once a year. Keeping a simple log of dates, findings, and completed work turns those checks into a clear record of each system’s condition, which makes budgeting easier and helps you plan major projects before failures force the decision.
A property that receives steady, informed care holds its value, performs more efficiently, and stays safer for everyone who lives there. Small, timely interventions keep the slow creep of wear from turning into the kind of sudden, costly emergencies that no homeowner wants to face.